INSTALLATION

INSTALLATION
Below we describe how easy it is to install an FWCloud system and how we can have it fully operational in a matter of just a few minutes.

As we stated in the description section, FWCloud contains two main modules: the user interface (FWCloud-UI) and the REST API (FWCloud-API), which handles all the actions requested by the user.
As part of a standard installation there are two additional modules:
Normally when a user accesses a FWCloud server, the first thing he does is download the user interface (FWCloud-UI) using a web browser (Chrome, Firefox, etc.) and access the FWCloud access URL which can be, for example, https://ui.fwcloud.net:3030 (it does not have to be a domain name, it can also be an IP address). This URL will take us to FWCloud-Websrv web server from which the FWCloud-UI application will be downloaded to the user’s terminal.
Once the application has been downloaded to our web browser, it will start running, displaying the login screen. From this moment, any action that we perform on FWCloud-UI (for example, completing the login process) will be carried out using FWCloud-API, to which FWCloud-UI will access by means of two different ways.


API access in direct mode:
FWCloud-UI connects directly to the server in which the API’s Node server is running by means of the API URL, for example, https://api.fwcloud.net:3131
In this access mode it is very important to keep in mind that, once FWCloud-UI is running in our browser, it must have direct access to the API URL in order to work correctly. That is, from our user terminal, we have to have access to the API URL so that FWCloud-UI can work correctly.
As we will see later, this mode of operation has the drawback that we need valid TLS certificates so that the browser does not have problems when accessing the API from the FWCloud-UI application.

API access in proxy mode:
In this API access mode the user interface doesn’t connect directly to the API, it makes it through the web server (FWCloud-Websrv) from which we have downloaded the FWCloud-UI.
FWCloud-Websrv acts as a proxy forwarding all the URLs that begin with /api/ or /socket.io/ to FWCloud-API.
This access mode has the advantage that avoids the need of direct access to the API URL from the user terminal, only having access to the web server in which the FWCloud-UI is located is enough.
It is the default installation option and the one implemented when using the FWCloud-Installer script to install a new FWCloud platform from scratch.
A FWCloud installation will have two main URLs:
It’s not necessary that these URL are domain names, they can also be IP addresses using self-signed TLS certificates for encrypt the communications.
However, we must bear in mind that if we use self-signed certificates, the browser will display a warning message indicating that we are accessing an insecure site and, in addition, in Firefox, the FWCloud-UI communication with FWCloud-API in direct mode will not work because of the browser’s security directives.
Therefore, in direct mode API access we recommend using for both URLs a couple of host names with their corresponding certificates, issued by a valid certificate authority, such as Let’s Encrypt.
Regarding the API access modes, we recommend using the proxy mode, it simplifies interaction with the user terminal and avoids problems with self-signed certificates like the one that we have already explained with Firefox web browser.
Once this is clear, we can now go on to explain in detail the installation process.
DEB/RPM PACKAGES
Installation by means of DEB/RPM Packages.
The easiest option to have our own FWCloud platform operational in a matter of a few minutes is to use the DEB or RPM packages available in our PackageCloud repository.
ATTENTION: A version of Node.js equal to or higher than 20 is required.
For a distribution based on DEB packages like Ubuntu or Debian we only have to execute the following commands:
curl -s https://packagecloud.io/install/repositories/SOLTECSIS/FWCloud/script.deb.sh?any=true | sudo bash
curl -fsSL https://deb.nodesource.com/setup_lts.x | sudo -E bash -
sudo apt -y install nodejs mariadb-server
sudo apt -y install fwcloud-api fwcloud-ui
And for a distribution based on RPM packages like Fedora or Rocky the process is very similar:
curl -s https://packagecloud.io/install/repositories/SOLTECSIS/FWCloud/script.rpm.sh?any=true | sudo bash
sudo dnf -y remove firewalld
curl -fsSL https://rpm.nodesource.com/setup_lts.x | sudo bash -
sudo dnf -y install nodejs mariadb-server
sudo systemctl enable mariadb && sudo systemctl start mariadb
sudo dnf -y install fwcloud-api fwcloud-ui
The first command is used to add our PackageCloud repository to the Linux distribution in which we want to install FWCloud. The following commands install the necessary packages.
It is important to take into account that it is not mandatory to install Node.js through the official packages for the Linux distribution, we can also install it by hand to have the latest version of Node.js.
In relation to the database engine we can use both MySQL and MariaDB.
Once the package installation process is complete, all we have to do to access our FWCloud instance is use a browser with the following data:
URL: https://SERVER_IP:3030
Customer code: 1
Username: fwcadmin
Password: fwcadmin

Once the installation is complete, we can use the systemctl command to stop, start or see the status of the different services that are part of a FWCloud platform: FWCloud-API and FWCloud-UI.
$ sudo systemctl status fwcloud-api
● fwcloud-api.service – FWCloud-API
Loaded: loaded (/etc/systemd/system/fwcloud-api.service; disabled; vendor preset: enabled)
Active: active (running) since Fri 2019-06-07 14:58:01 UTC; 8s ago
Main PID: 14359 (node)
Tasks: 11 (limit: 1109)
CGroup: /system.slice/fwcloud-api.service
└─14359 /usr/bin/node /opt/fwcloud-api/bin/www
Jun 07 14:58:01 fwcloud-vm systemd[1]: Started FWCloud-API.
FWCloud-installer
Installation by means of FWCloud-Installer script.
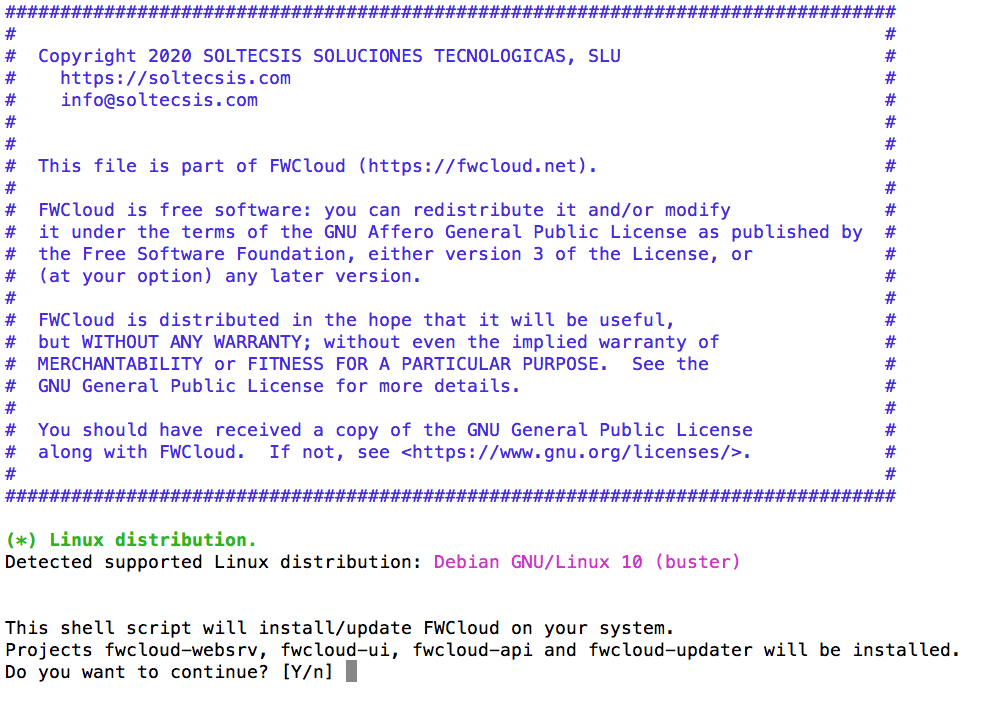
FWCloud-Installer is a shell script that will simplify the entire installation process and allow us to have a fully operational FWCloud server in a matter of a few minutes.
These are the Linux distributions supported by FWCloud-Installer:
This script will install a FWCloud server with the next features:
We are going to download FWCloud-Installer directly from GitHub using the curl command, therefore, we have to make sure that it is installed in our server. For example, for Linux Ubuntu and Debian distributions, this is the command that we have to use in order to install the curl command if we don’t already have it installed.
sudo apt install curl -yNext we can run the following commands string to run FWCloud-Installer:
curl -k -s https://raw.githubusercontent.com/soltecsis/fwcloud-installer/main/fwcloud-installer.sh -o ./fwcloud-installer.sh && sudo bash ./fwcloud-installer.sh && rm -f ./fwcloud-installer.shFWCloud-Installer will start the installation process, during which it will carry out various checks to verify that our system meets all the requirements to install FWCloud, install the necessary packages, create the database, carry out the necessary configurations, generate self-signed TLS certificates, etc.
The script will ask us some questions in case we want to customize our installation. For example, if our sever is behind a web proxy, if we want to use TLS certificates, etc.
As a general rule, the default values for these questions are usually correct.
If we launch FWCloud-Installer on a server in which there is already an FWCloud installation, the script will try to update it. The update can be done from the user interface, therefore, it is not necessary to use the script for this task.
Once the installation process is successfully completed, we will be presented with a summary with the data we have to use to access our newly installed FWCloud server.
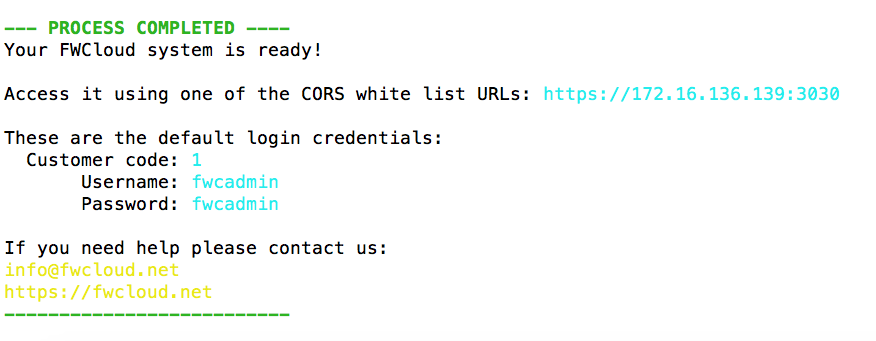
All we have to do is use our web browser to access the indicated URL using the default access data:
Customer code: 1
Username: fwcadmin
Password: fwcadmin

Once the installation is complete, we can use the systemctl command to stop, start or view the status of the different services that are part of a FWCloud platform: FWCloud-Websrv, FWCloud-API and FWCloud-Updater.
$ sudo systemctl status fwcloud-api
● fwcloud-api.service – FWCloud-API
Loaded: loaded (/etc/systemd/system/fwcloud-api.service; disabled; vendor preset: enabled)
Active: active (running) since Fri 2019-06-07 14:58:01 UTC; 8s ago
Main PID: 14359 (node)
Tasks: 11 (limit: 1109)
CGroup: /system.slice/fwcloud-api.service
└─14359 /usr/bin/node /opt/fwcloud-api/bin/www
Jun 07 14:58:01 fwcloud-vm systemd[1]: Started FWCloud-API.
DOCKER COMPOSE
Installation by means of Docker Compose.
Every time we publish a new version of the different modules that make up FWCloud, the corresponding Docker image is automatically generated within our DockerHub account.
This makes it very easy to run FWCloud as a Dockerized application. To facilitate the use of the Dockerized version of FWCloud we have created a Docker Compose file in our fwcloud-docker GitHub repository.
So if you have Docker and Docker Compose installed, just run the following script to start using FWCloud:
curl -k -s https://raw.githubusercontent.com/soltecsis/fwcloud-docker/main/docker-compose.yml -o ./docker-compose.yml && docker-compose upAll we have to do is use our web browser to access FWCloud using the default access data:
URL: https://localhost:3030
Customer code: 1
Username: fwcadmin
Password: fwcadmin
To update Docker containers when new versions of FWCloud are available, we just have to use the following commands:
docker-compose down && docker-compose pull && docker-compose upFWCloud is an OpenSource product under the GNU AGPL v3 license.